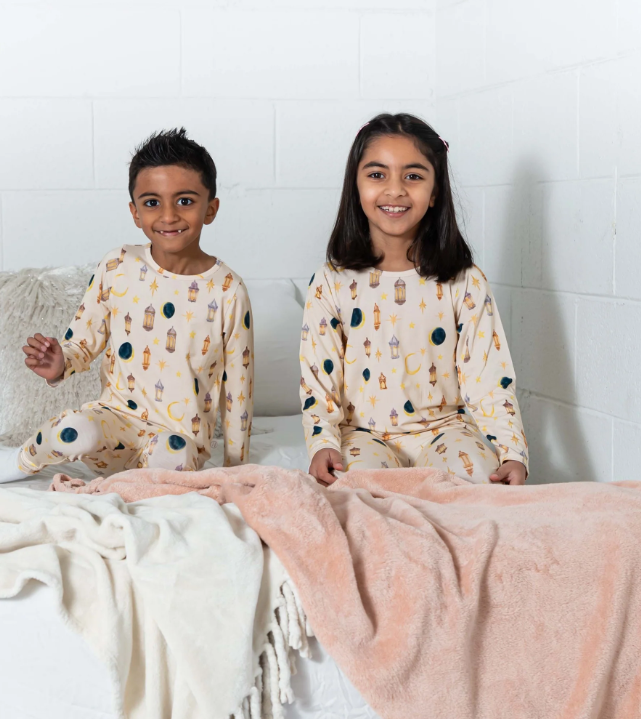
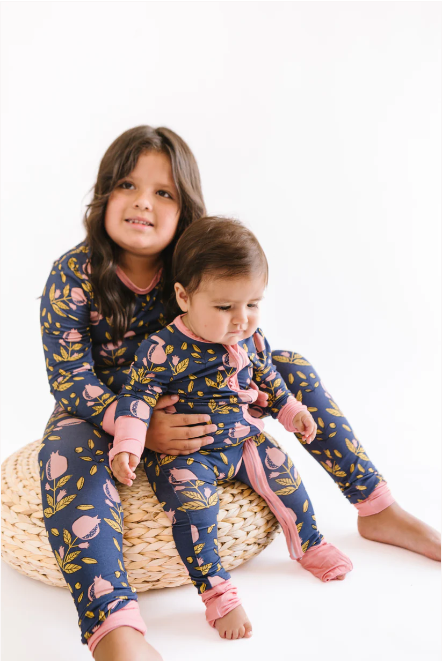
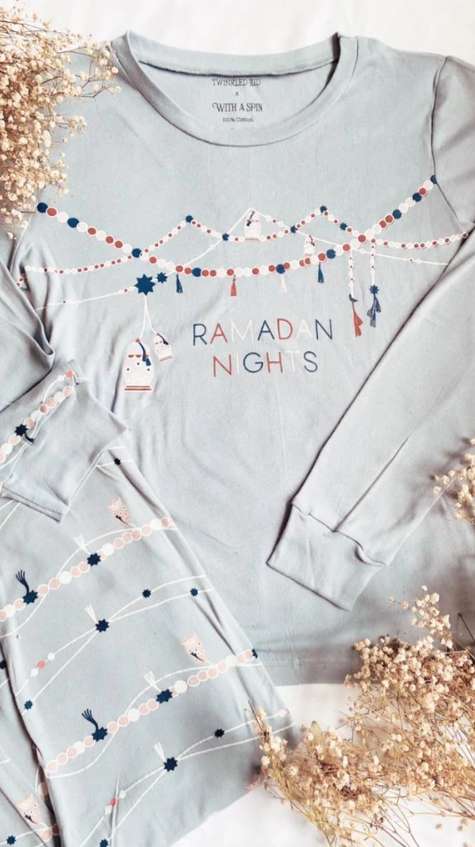
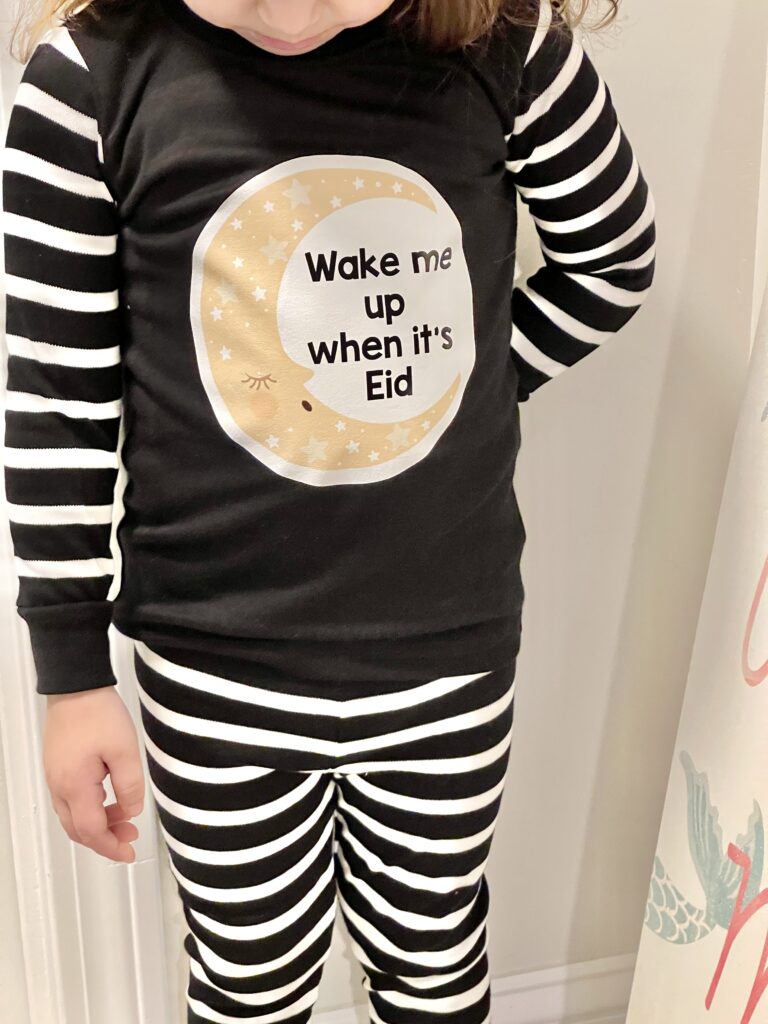
I t’s a family affair when it comes to these cute Ramadan & Eid Family PJ options!
Wanting to know where to buy Ramadan & Eid family and kids pajamas? We got you! We’ve gathered a list of Eid PJs for the family, or just Eid pajamas for the kids. And so many options, mashallah. Pinks, black and whites and other fun others. Make sure everyone has a good sleep in their Eid PJs.
We hope you enjoyed where to buy Ramadan & Eid family and kids pajamas. Let us know some of your favorites below and make sure to Pin the article to Pinterest. And, as always, make sure to follow us on Instagram for more Ramadan & Eid inspiration.
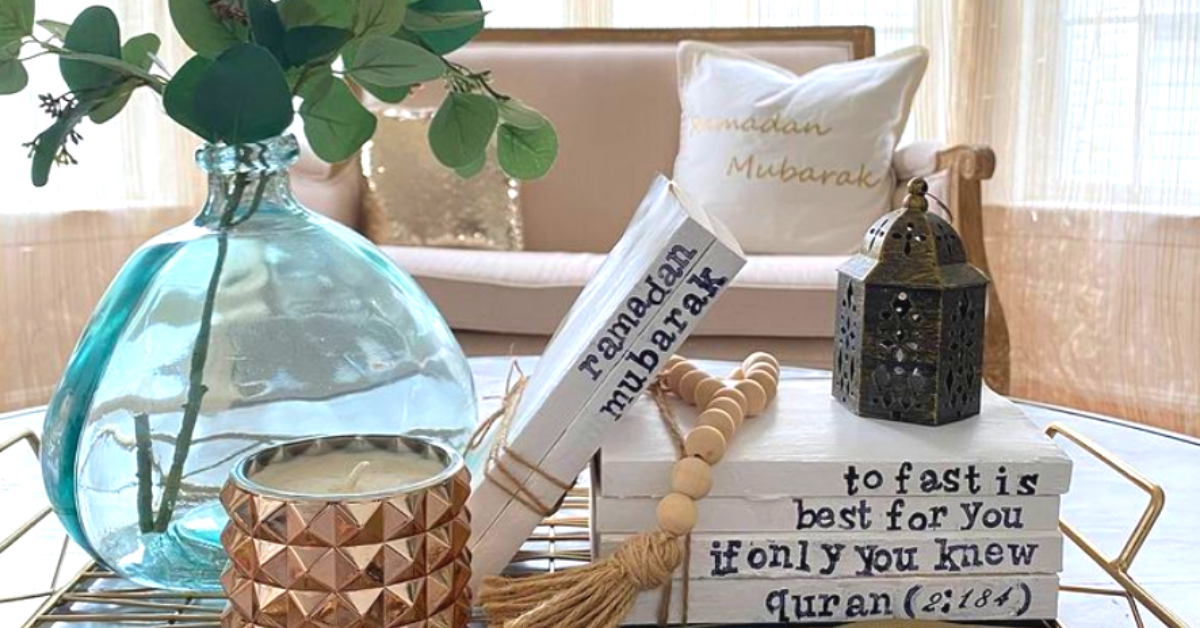
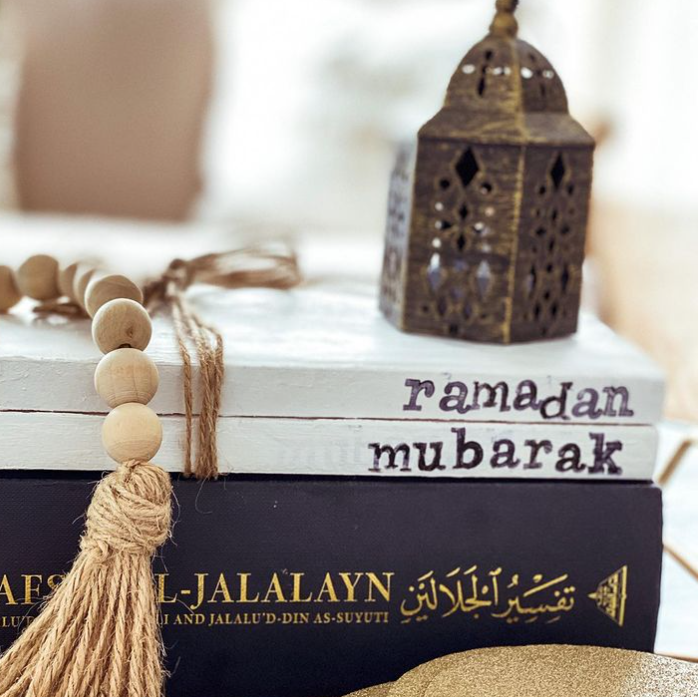
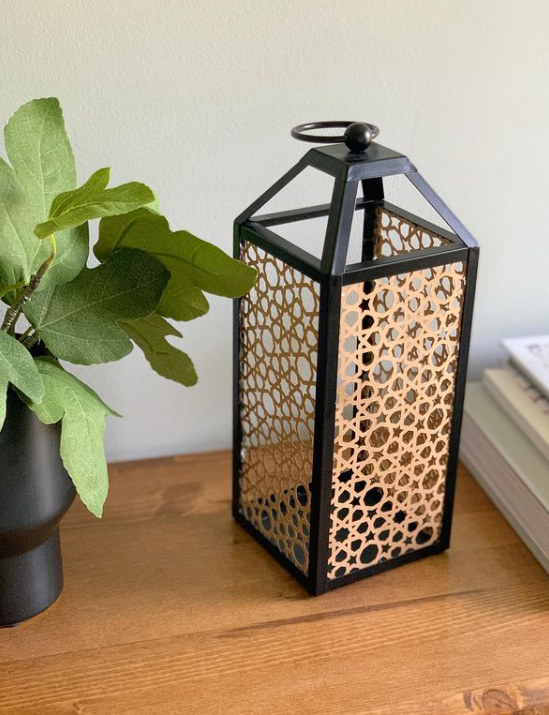
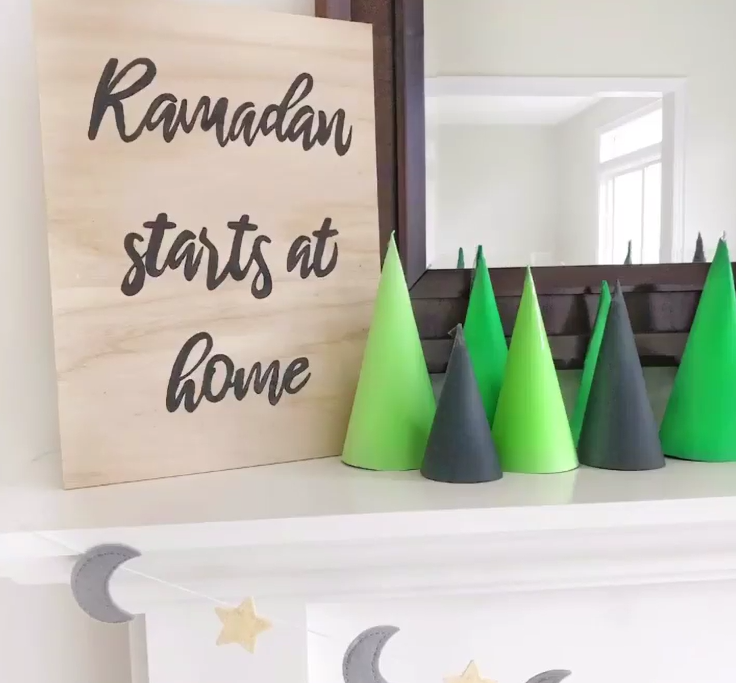
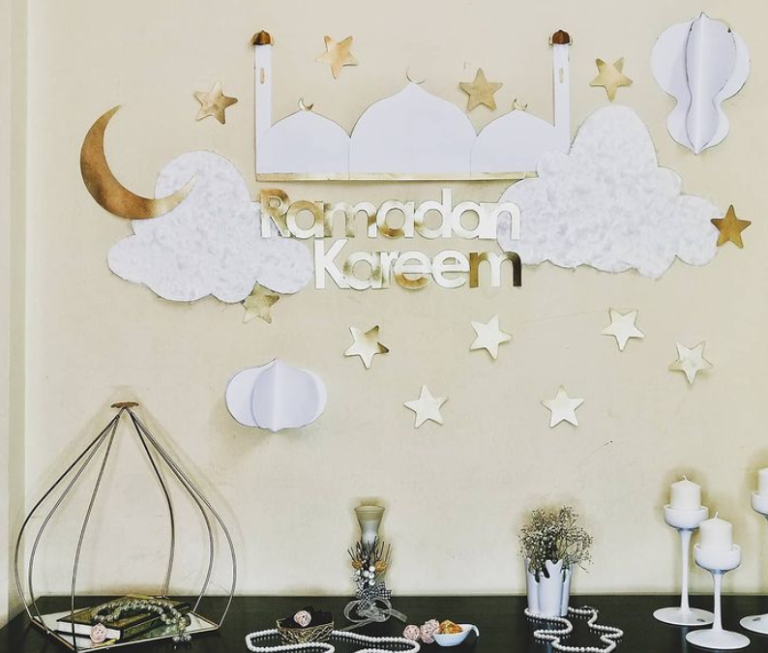
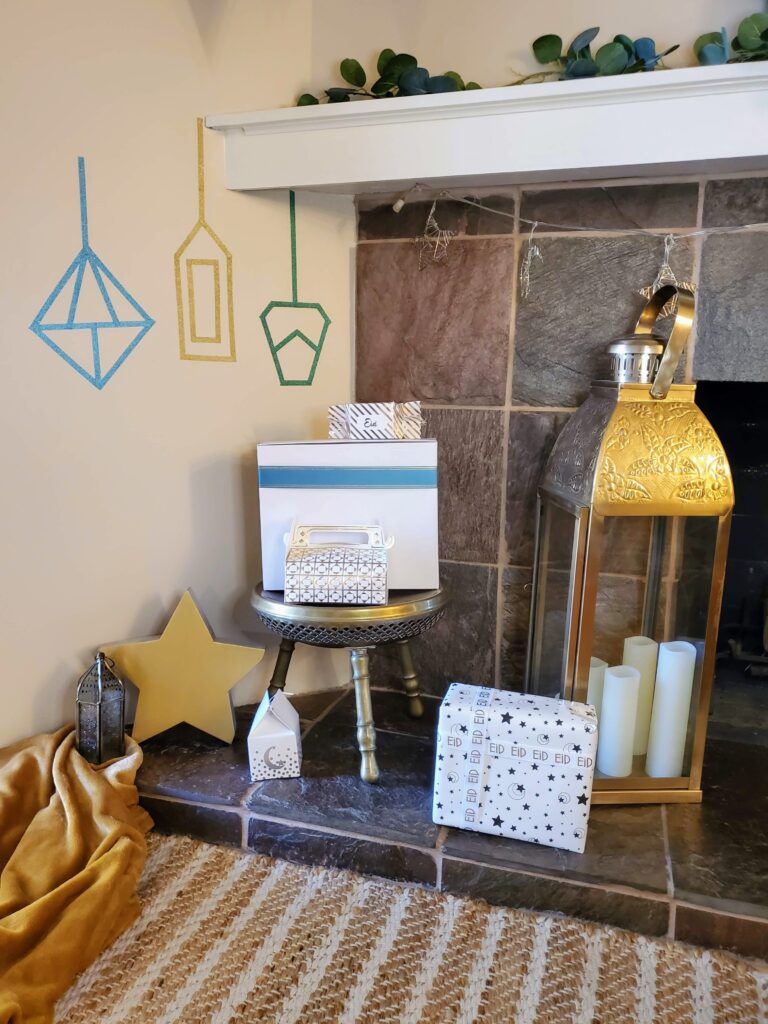
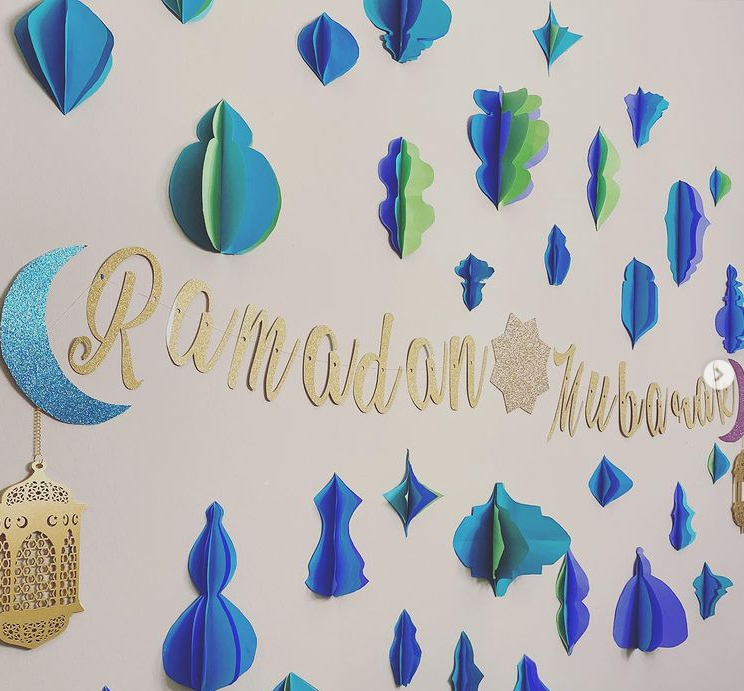
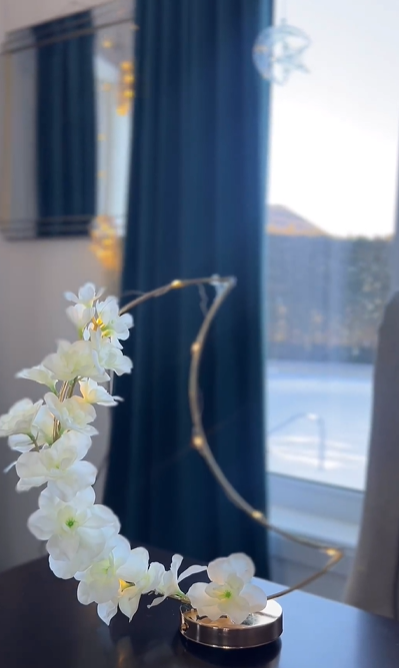
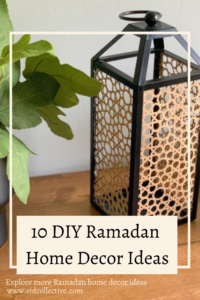
D ecorating your home in style for Ramadan – but doing it yourself
Here are 10 DIY Ramadan Home Decoration Ideas for this year. It’s so much fun because DIYs are growing every year! Each year creators are getting more and more creative so that we create our own Ramadan decorations at home.
We hope you enjoyed these Modern Ramadan & Eid Decorations. Let us know some of your favorites below and make sure to Pin the article to Pinterest. And, as always, make sure to follow us on Instagram for more Ramadan & Eid inspiration.
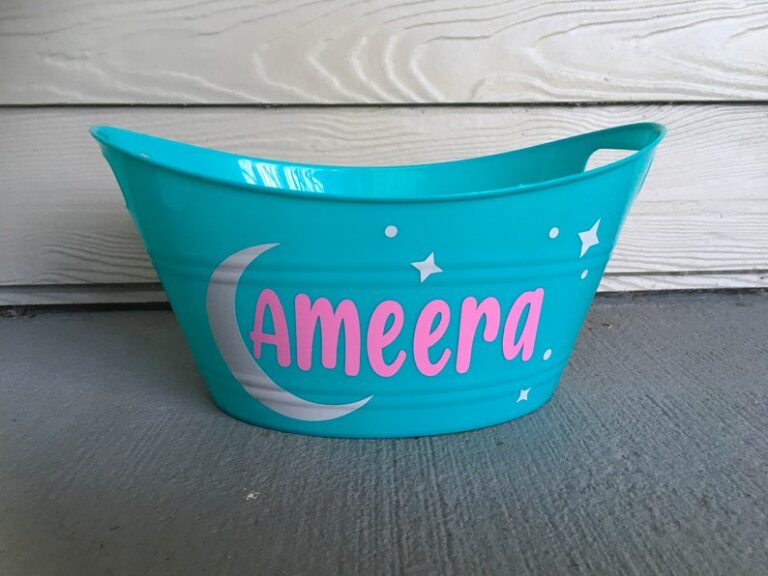
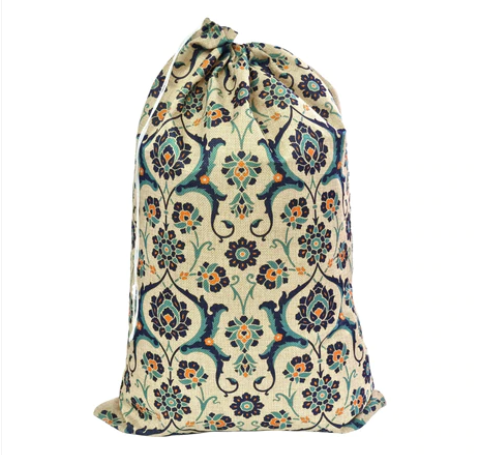
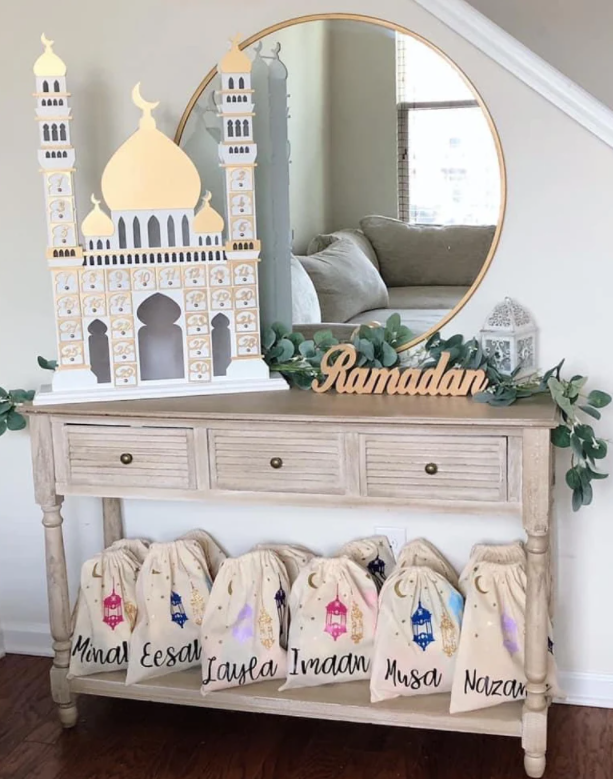
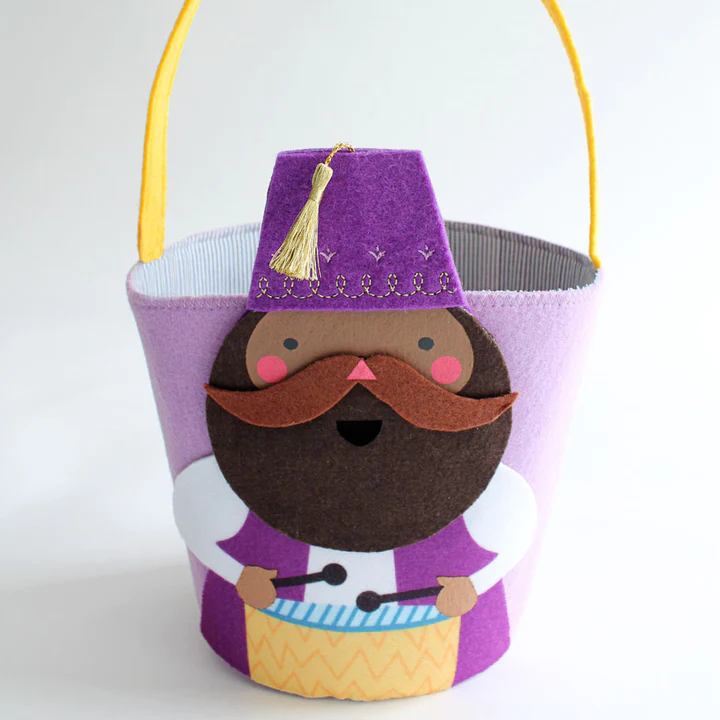
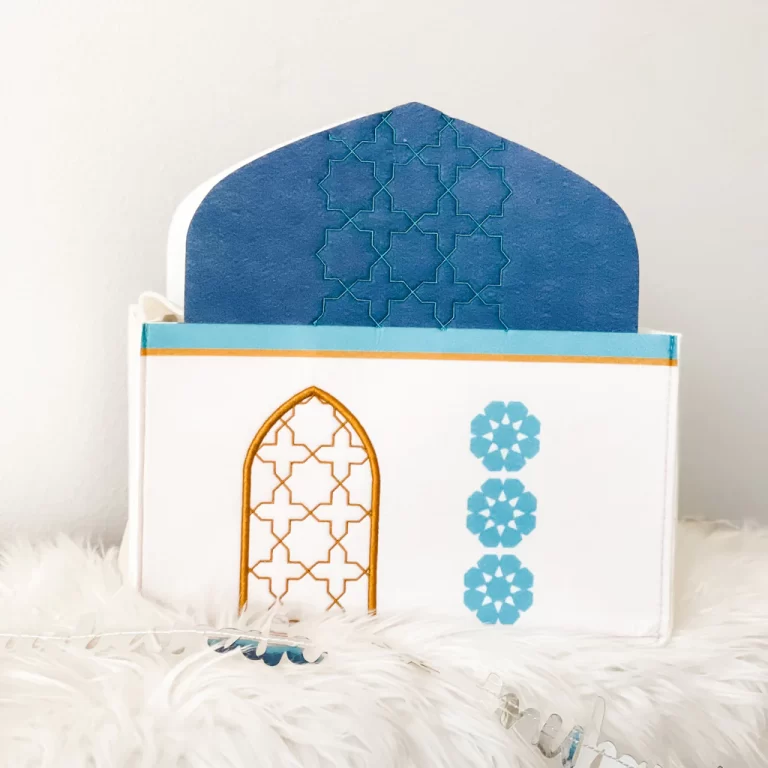
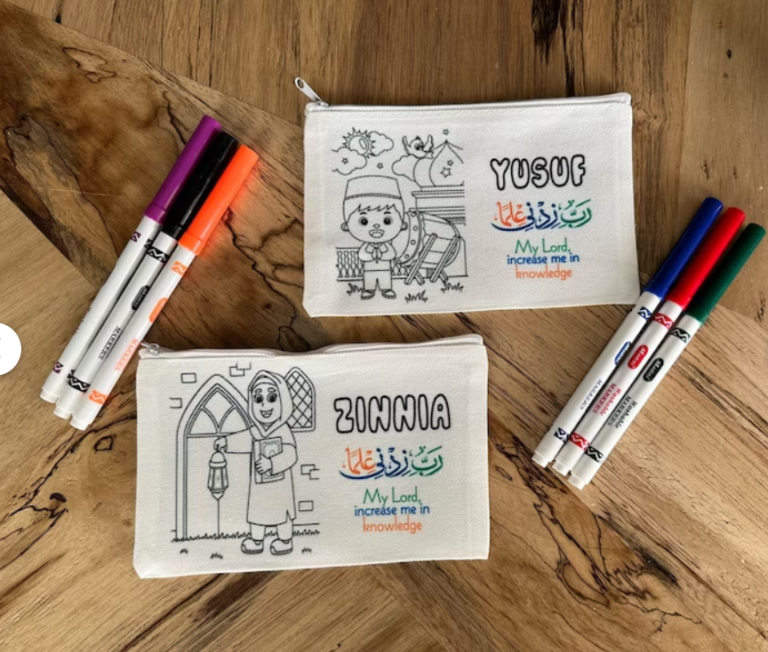
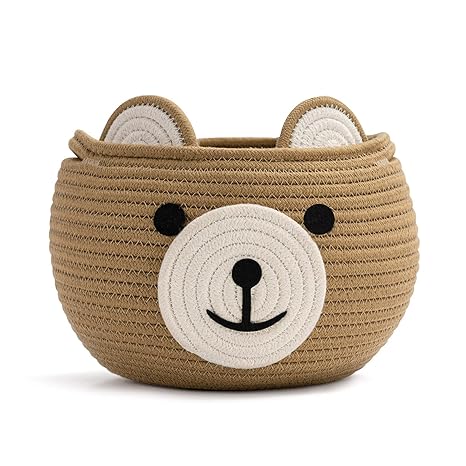
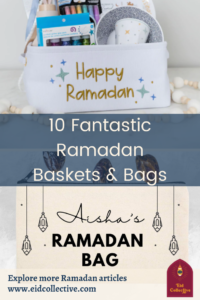
F or the kids, or yourself, these baskets & bags are awesome for Ramadan
We’ve rounded up 10 fantastic Ramadan baskets & bags for you, or the kiddos. It’s always nice to welcome Ramadan with a kid’s Ramadan basket or a fun filled Ramadan bag for kids. Stuff them with our favorite ideas for basket fillers. We really like to stuff them with Ramadan activities and few small gifts. Or grab your own Ramadan bag to celebrate the season yourself.
We hope you enjoyed these 10 fantastic Ramadan baskets & bags. Let us know some of your favorites below and make sure to Pin the article to Pinterest. And, as always, make sure to follow us on Instagram for more Ramadan & Eid inspiration.
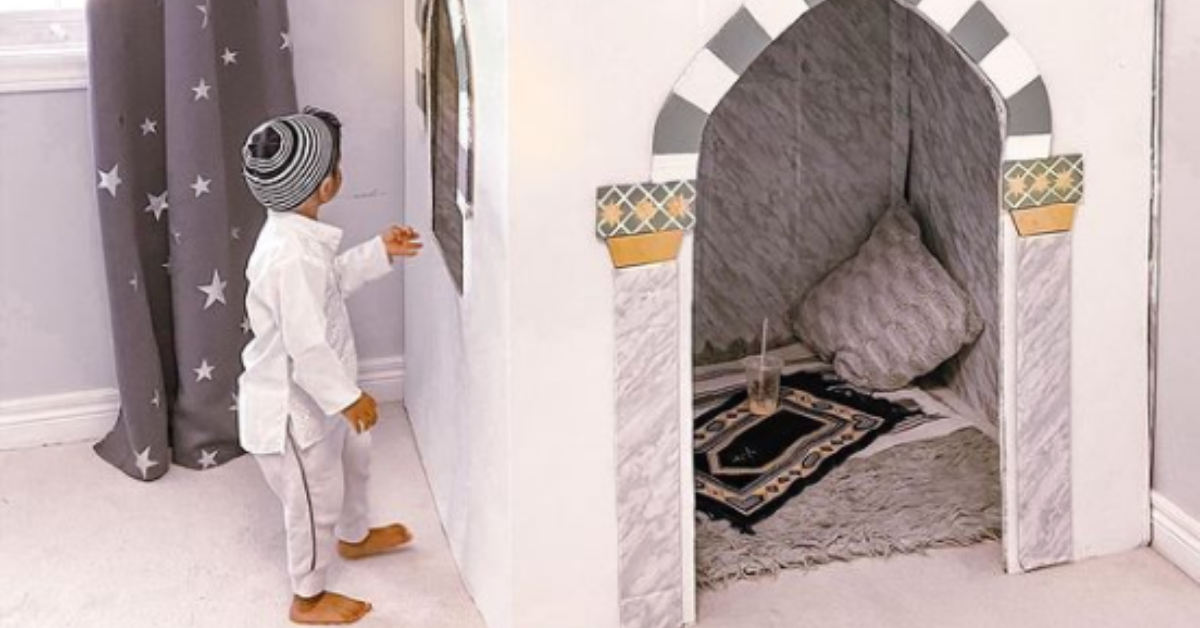
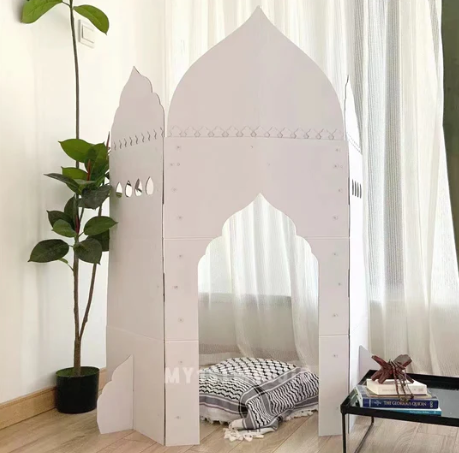
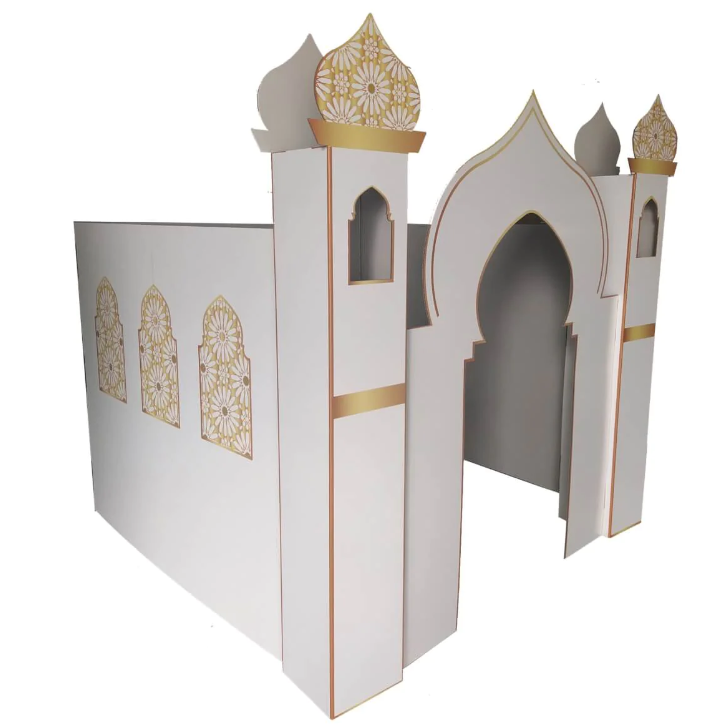
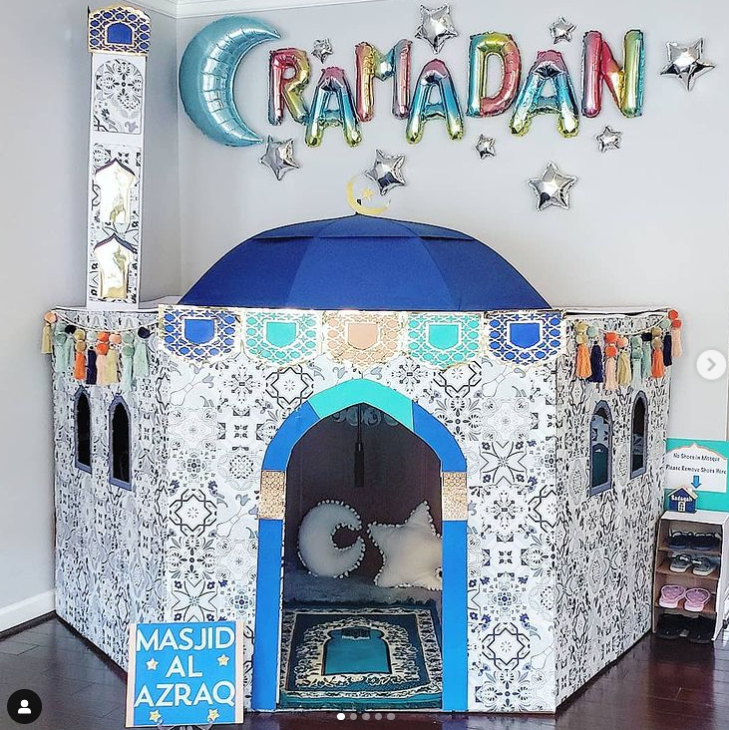
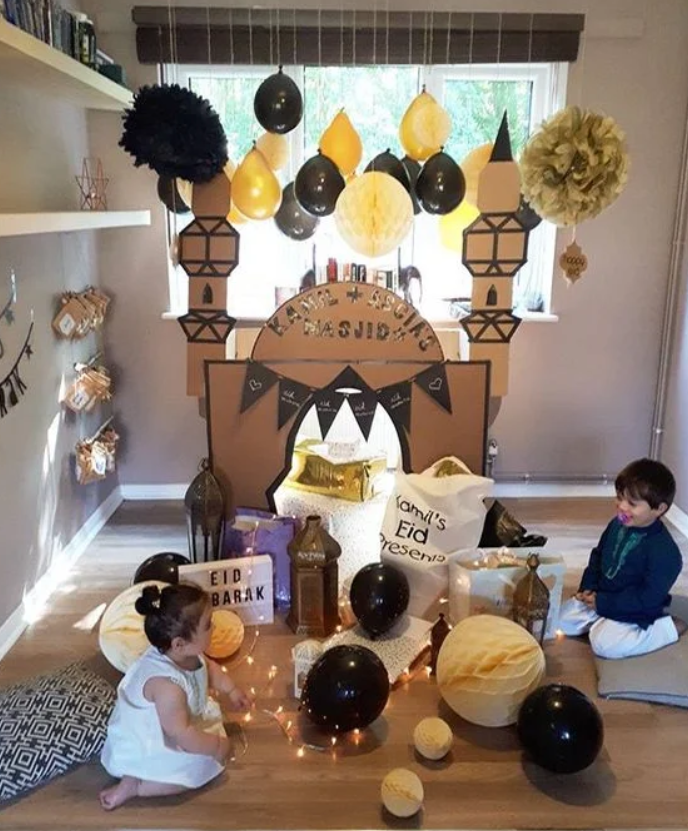
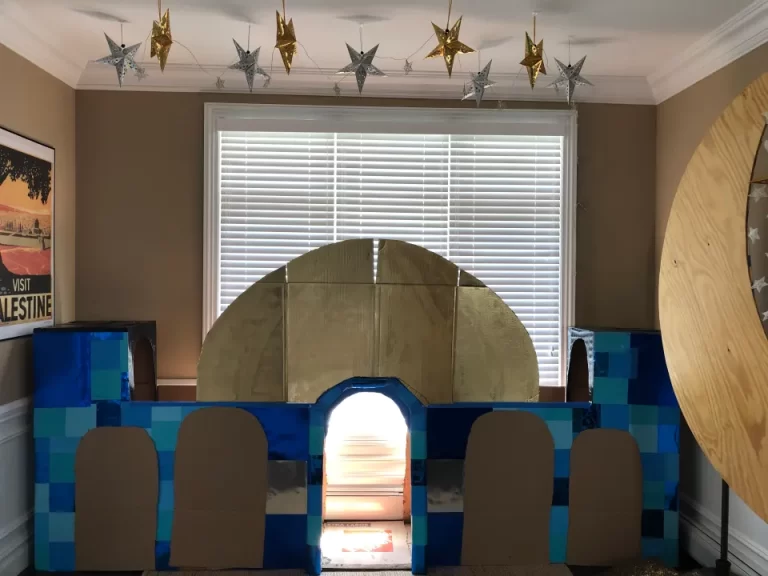
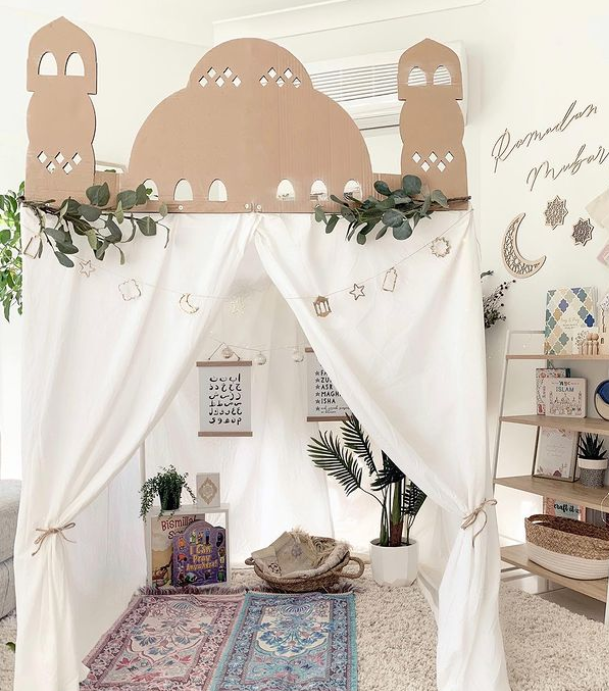
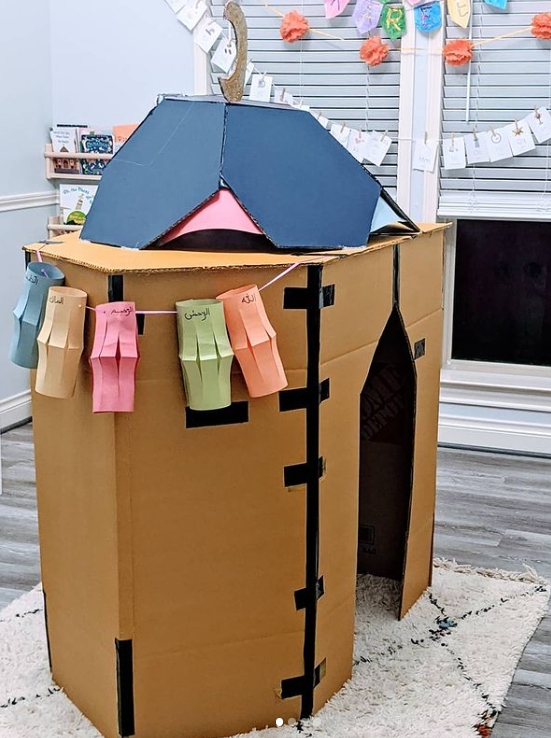
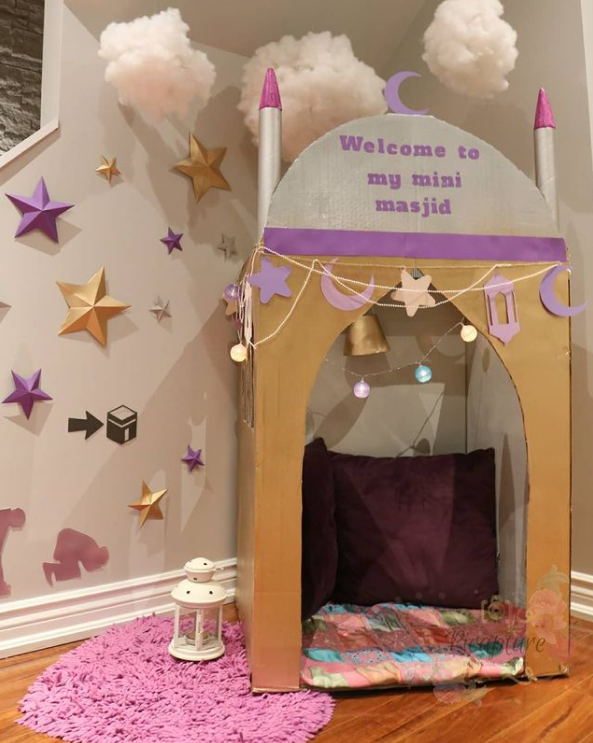
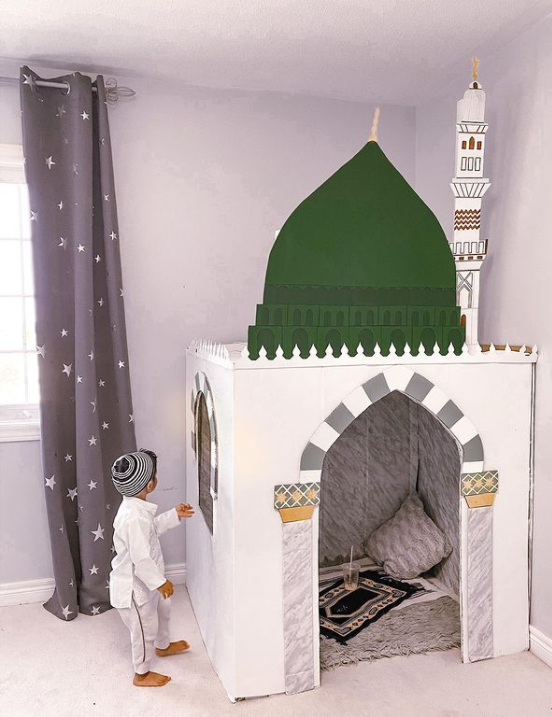
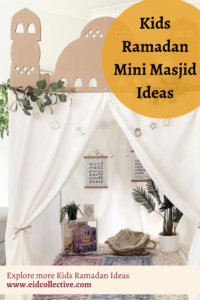
C reate a special prayer area for the kids & family with these creative ideas!
A fun roundup of kid’s Ramadan mini masjid ideas. We know how hard praying can be with the little ones and encouraging them to do so with exciting at-home mosques are just the thing. Having that special prayer area reminds the entire family to keep up with their daily prayers and thikr – which we all need. So grab some supplies and get building!
We hope you enjoyed these Modern Ramadan & Eid Decorations. Let us know some of your favorites below and make sure to Pin the article to Pinterest. And, as always, make sure to follow us on Instagram for more Ramadan & Eid inspiration.
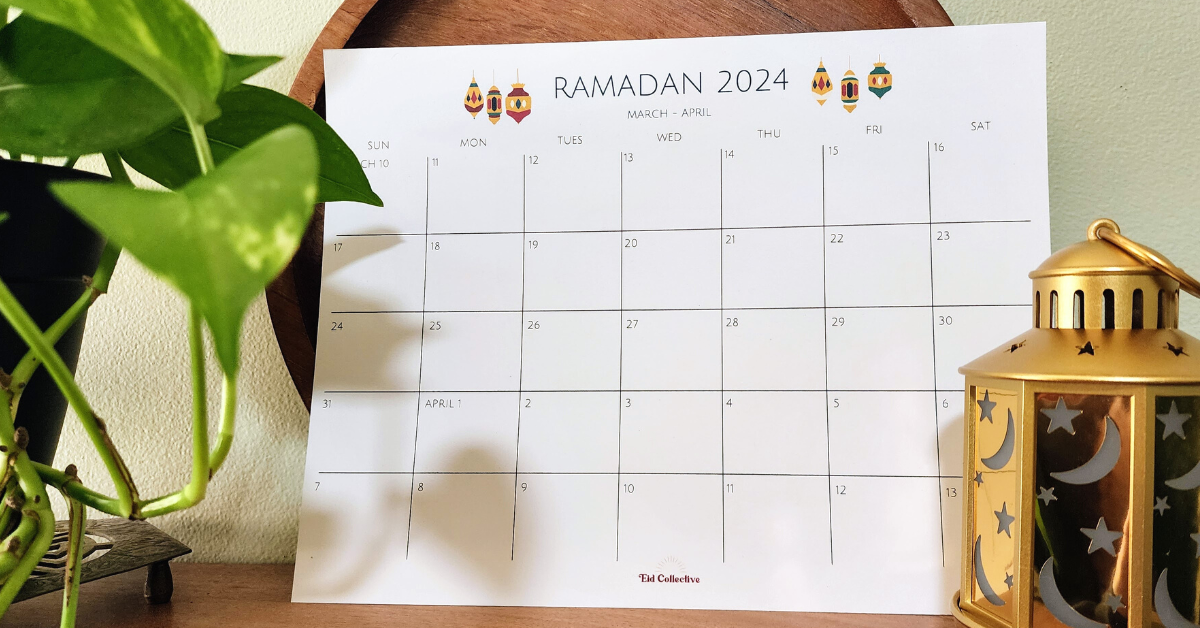
You need these 2024 Ramadan Calendars. I think by now you’ve come to the conclusion that Eid Collective is here to help you out during Ramadan. So far we’ve got the Ramadan Prep Checklist, Iftar Checklist and now these super handy Ramadan calendars.
This Islamic printable was designed by Eid Collective.
Sign up for our newsletterand make sure to follow us on Instagram for more Ramadan & Eid inspiration.
Note: This post contains affiliate links. You can read our disclosure on our privacy page.
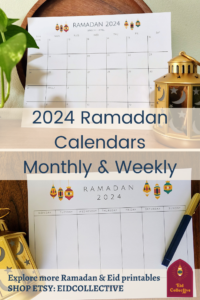
Monthly Ramadan Calendar
You need to see the entire month at a glance. What day is your parent’s iftar again? That’s why we love our 2024 Ramadan monthly calendar. It’s just so helpful and clean to make sure that you organized all Ramadan.
Weekly Ramadan Calendar
How about a weekly breakdown during Ramadan? Maybe you’re hosting an iftar and need to list out the entire menu or maybe you just have a lot of activities going on. Whatever your calendar looks like, break it down by weeks this Ramadan.
Ramadan Events Calendar
Looks like we can go back out again! So now you need to keep up with all those iftar invites, charitable events and fun activities. And keep the family’s schedules in central location this Ramadan.
Ramadan Menu Planner Calendar
One of the most popular usages for our 2021 Ramadan calendar was to plan out all those meals. You’re busy and you’re hungry. So pre planning that iftar dinner every night is so helpful. This way you have food planned and don’t have to worry anything. And you know darn well those older kids are asking you every second what’s for dinner. Go check the calendar kid.
Printables are intellectual property of Eid Collective. You may not use Eid Collective printables to sell items or alter them in any way. Please do not send or distribute printables to others, once you gain access to the printables, it is for you, and you alone to print and enjoy.
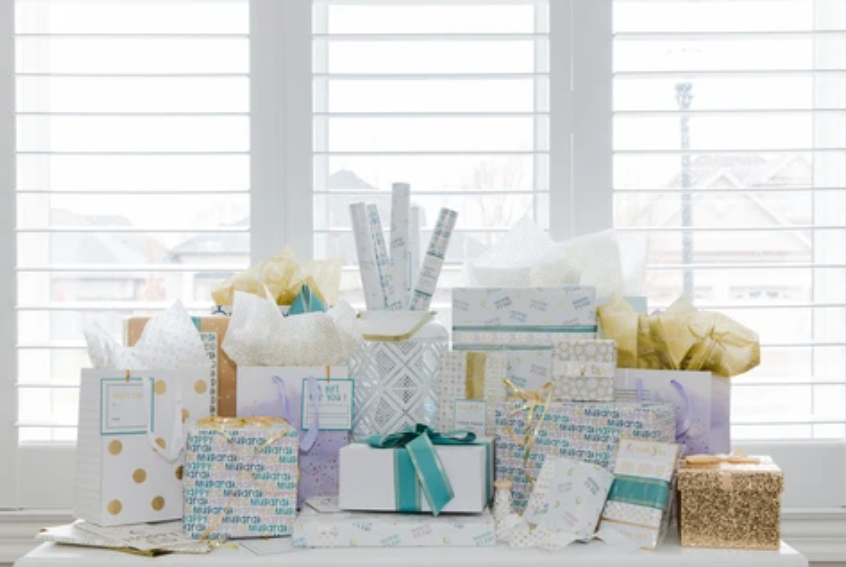
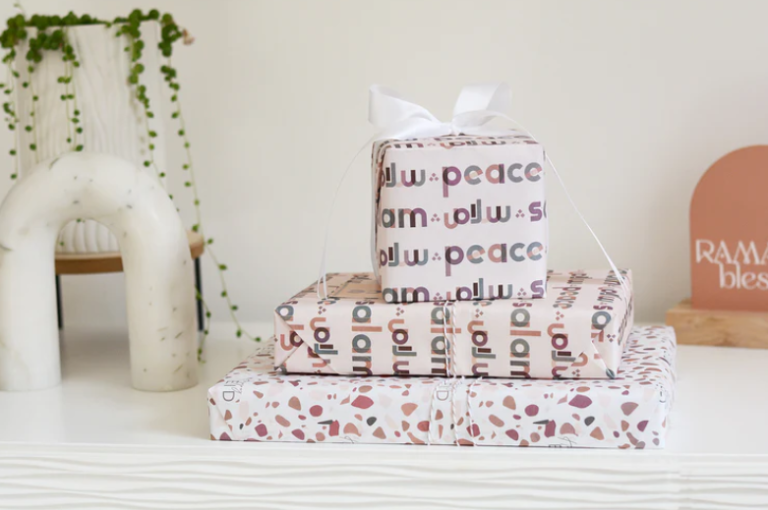
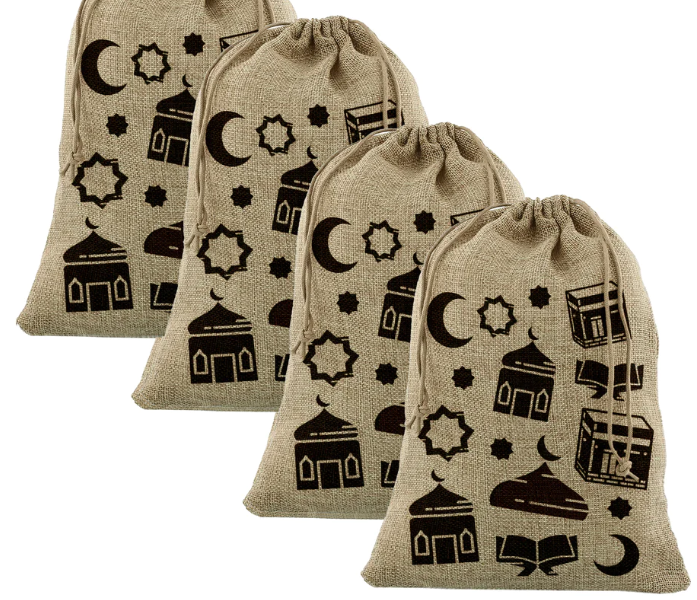
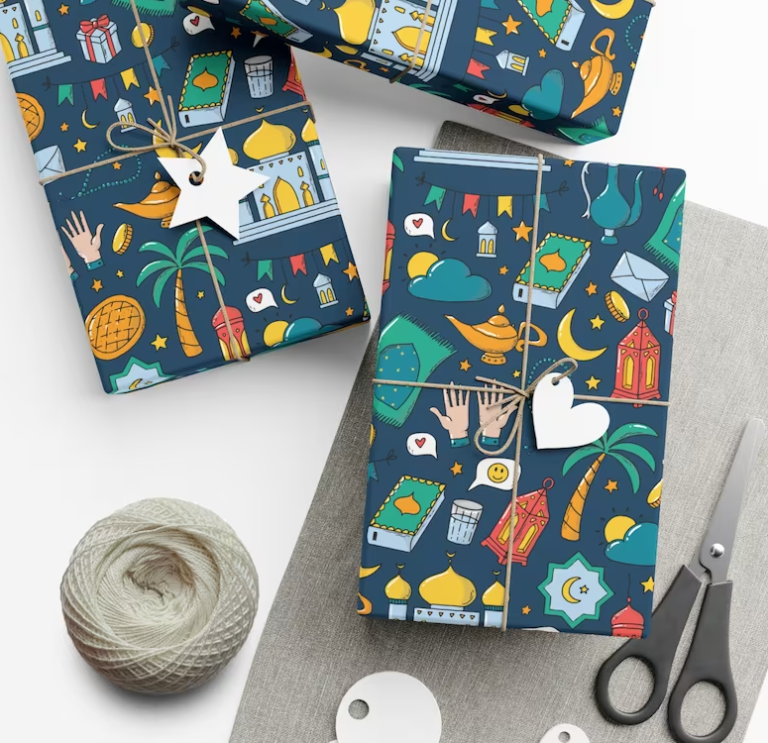
Where to buy Eid gift wrap? And not just Eid wrapping paper, but all of it: tissue paper, gift sacks, bags, ribbons, and gift tags! It’s such a fun way to really be festive during Eid. And honestly, if you’re smart with some of the items they’ll last through a couple of Eids.
And this category is growing so each year there is a fun new print for kids or a mature new style for adults. We recommend buying your gift wrap around Ramadan to make sure you’re all set and have plenty of time to wrap gifts.
Make sure to follow us on Instagram for more Ramadan & Eid content and subscribe to the newsletter for discounts and free printables.
Let’s take a look at some of our current favorites!
So many options now for Eid wrapping paper, tissue paper, gift sacks, ribbon, and gift tags. Happy wrapping!
We hope you enjoyed these Where to Buy Eid Gift Wrap. Let us know some of your favorites below and make sure to Pin the article to Pinterest. And, as always, make sure to follow us on Instagram for more Ramadan & Eid inspiration and sign up for the newsletter for discounts and free printables!
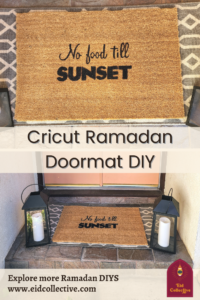
Create your own, customizable, fun & cheeky Ramadan doormat on your Cricut.
This Cricut Ramadan Doormat DIY is playful. Fun, cute, silly, but also difficult. I’m going to be real honest here, it’s not a quick and easy craft. It’s a craft that takes time and a load of patience – particularly if you’ve never dealt with a doormat and it’s unkind texture. Because your vinyl won’t stick very well, but is it worth it in the end? We think so. A YouTube tutorial for this Ramadan Cricut craft is on its way over on our YouTube channel. Subscribe & follow to get notifications. We hope to bring you more Ramadan Cricut projects & ideas in the future!
Scroll to the bottom to skip to the step-by-step instructions.
Sign up for our newsletterand get all the DIYs sent to you email every time. And make sure to follow us on Instagram for more Ramadan & Eid inspiration.
Note: This post contains affiliate links. You can read our privacy policy.
Supplies
Let’s run through the supplies really quick. Because this craft does need a fair amount of more unusual pieces due to it’s size. Products are linked, or visit our Amazon storefront
Cricut – we used the Explorer 2
Large 12×24 Cricut Cutting Mat
Large Removable Vinyl
We heard permanent vinyl is better for this project, but we used removable
Large transfer tape
Weeding tools
Scissors
Doormat
Amazon
IKEA
Paint possibilities – pick one:
Flex Seal paint
Rust Oleum paint
Outdoor Acrylic Paint – we did this
Foam paintbrush
Thin paintbrush
Painter’s tape
Create the message for the doormat
Measure your mat
The IKEA one was 35 wide 23 ½ inches tall
Determine what size you’d like your message. Ours was around 12 tall x 17 ½ wide
Design your message, or use ours – get it here
Select all of the words by highlighting them
Group them together
Leave them highlighted and weld the message together
Make it into a stencil
Go to shapes and add a rectangle.
Make the rectangle the same size as the letters
Move the message group above the rectangle
Highlight the message & the rectangle
Slice everything together
Leave just the stencil
Now remove the top 2 layers of the design.
Delete the just font layers until you’re left with the box with the font stencil
Now it’s time to print
Place the vinyl on the cutting mat
Now it’s time to cut the vinyl to size
We cut a 12×18 size for the vinyl
Lay the vinyl on your printing mat, make sure to get all the air bubbles out.
And make sure you have lots of space behind your Cricut for your mat to go through
Cut the message
On your Cricut machine select vinyl
Select ‘make it’
Hit continue
Load your mat & hit the loading button on your machine
Once loaded, hit cut on your machine
Once it’s done cutting, unload the mat
Weed out the message
Take the vinyl off the mat
Wed your stencil by removing the letters and the far outside area to leave the rectangle in place
Place the transfer tape on top
Trim your transfer tape to size
Take your transfer tape and place it over the top of your stencil, smoothing out any bubbles
Remove the vinyl
Before you peel, measure the stencil and mark where you’d like to place it on your doormat. So you’re ready to go.
Peel the transfer tape and stencil away from the stencil backing
This takes a lot of patience, go slow
Place the message on the doormat
Lay down your heat pad or towel, doubled over, on your table. Place your blanket on top. Next, figure out spacing of the lanterns. We did 2 1/2 inches in between, but I would bump that up to 3 or 3 1/2 inches space. Heat the iron to 315 degrees while doing this.
Tape the message down
Place the stencil on the doormat lightly. Before you push it down, measure once more to make sure it’s centered
Scrape the stencil down onto the doormat
As you start to peel the contact paper off, start to tape down your design. Use loads of tape and be careful – your stencil will still move.
Continue to peel the transfer tape off and add the rest of your tape
Paint
Take your acrylic or outdoor paint and using a foam brush, paint over the stencil. Make sure you do it around medium pressure. Don’t worry about every crevice, you can fill that in after the stencil is off. You really want to make sure at least the outline is there
Remove the stencil once you’re done or wait around 10 minutes. As always, be careful as the paint is wet
Weed out the smaller sections
After the stencil
Not great. Let’s fill it in.
Fill in
Take your thin paintbrush and go in to finish filling out the message and smoothing out the design. Much better!
We heard permanent vinyl is better for this project, but we used removable
Large transfer tape
Weeding tools
Scissors
Doormat
Amazon
IKEA
Paint possibilities – pick one:
Flex Seal paint
Rust Oleum paint
Outdoor Acrylic Paint – we did this
Foam paintbrush
Thin paintbrush
Painter’s tape
Cricut Instructions – Design
Measure your mat
The IKEA one was 35 wide 23 ½ inches tall
Determine what size you’d like your message. Ours was around 12 tall x 17 ½ wide
Design your message, or use ours – get it here
Select all of the words by highlighting them
Group them together
Leave them highlighted and weld the message together
Go to shapes and add a rectangle.
Make the rectangle the same size as the letters
Move the message group above the rectangle
Highlight the message & the rectangle
Slice everything together
Now remove the top 2 layers of the design.
Delete the just font layers until you’re left with the box with the font stencil
Now it’s time to print
Cut the Vinyl
Now it’s time to cut the vinyl to size
We cut a 12×18 size for the vinyl
Lay the vinyl on your printing mat, make sure to get all the air bubbles out.
And make sure you have lots of space behind your Cricut for your mat to go through
Cricut Instructions – Print
On your Cricut machine select vinyl
Select ‘make it’
Hit continue
Load your mat & hit the loading button on your machine
Once loaded, hit cut on your machine
Once it’s done cutting, unload the mat
Take the vinyl off the mat
Wed your stencil by removing the letters and the far outside area to leave the rectangle in place
Trim your transfer tape to size
Take your transfer tape and place it over the top of your stencil, smoothing out any bubbles
Painting Time
Before you peel, measure the stencil and mark where you’d like to place it on your doormat. So you’re ready to go.
Peel the transfer tape and stencil away from the stencil backing
This takes a lot of patience, go slow
Place the stencil on the doormat lightly. Before you push it down, measure once more to make sure it’s centered
Scrape the stencil down onto the doormat
As you start to peel the contact paper off, start to tape down your design. Use loads of tape and be careful – your stencil will still move.
Continue to peel the transfer tape off and add the rest of your tape
Take your acrylic or outdoor paint and using a foam brush, paint over the stencil. Make sure you do it around medium pressure. Don’t worry about every crevice, you can fill that in after the stencil is off. You really want to make sure at least the outline is there
Remove the stencil once you’re done or wait around 10 minutes. As always, be careful as the paint is wet
Weed out the smaller sections
Take your thin paintbrush and go in to finish filling out the message and smoothing out the design
Let it sit for 24 hours before doing anything
Printables are intellectual property of Eid Collective. You may not use Eid Collective printables to sell items or alter them in any way. Please do not send or distribute printables to others, once you gain access to the printables, it is for you, and you alone to print and enjoy.
Showcase it! When you print up the Cricut Ramadan Doormat Craft, make sure to tag us in your photos. We look forward to seeing how you’ve displayed it!
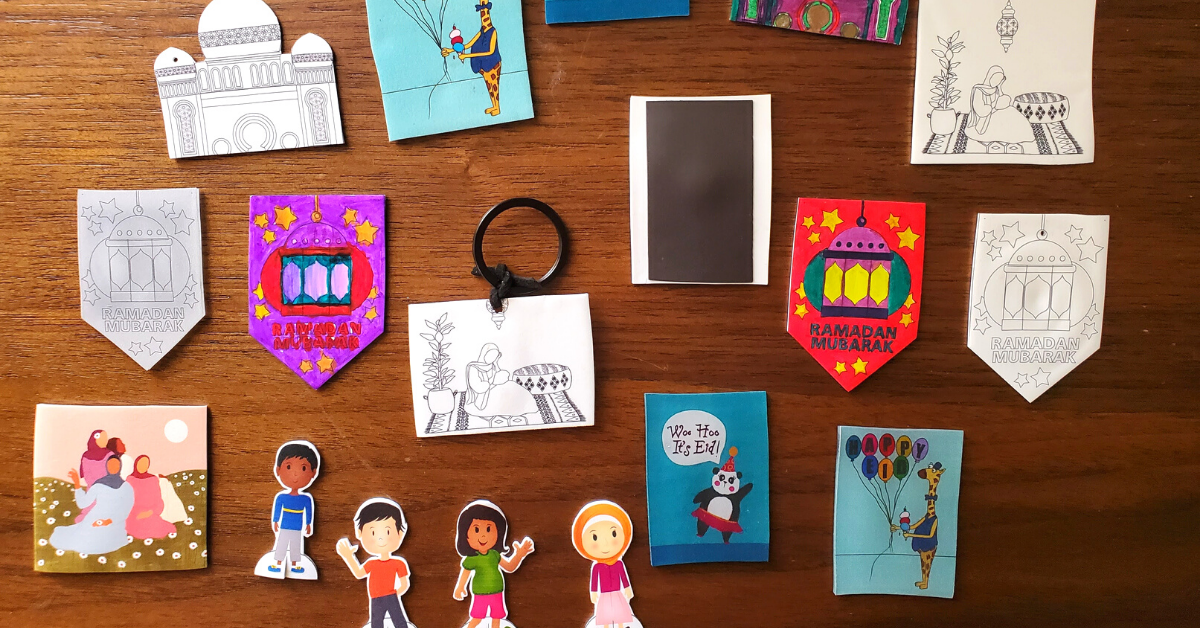
Who doesn’t love shrinky dinks?! It’s big, then it’s little! Your kids will love this Ramadan craft.
Everyone loves these Ramadan DIY shrinky dinks for Ramadan! Not only are they super cute, hello mini stuff, but they’re super satisfying to watch shrink. And it’s truly easier than you think. These would make super fun gifts for the kids, or a great activity to keep the kids busy during Ramadan. Plus, you’ll get so many shrinky dinks out of the supplies, you can invite all the kids over!
We’ll be using our printables as the images for the shrinky dinks – you can download them below. There are a ton of options on the sheets from: image ready ones to ones to color sheet ones. We prefer to print all of them and have an array of printables.
Sign up for our newsletterand get all the DIYs sent to you email every time. And make sure to follow us on Instagram for more Ramadan & Eid inspiration.
Note: This post contains affiliate links. You can read our privacy policy.
Let’s make these Ramadan shrinky dinks!
At the minimum, you’ll need these printable shrinky dink papers for inkjet printers, an inkjet printer, sharpies and scissors. You can do some extra things to your shrinky dinks like make them into keychains or magnets – so grab those supplies (listed at the bottom of the article) if you’ll be doing that!
You must have an inkjet printer for the paper to work! Make sure to set your printer to print for a matte paper and make sure the printer prints onto the flat/matte side! It will not print on the shiny side.
After printing the shrinky dinks on the paper, it’s time to color the coloring sheet ones. And all you need to color, are sharpie pens. We adore the neon set to make a fun punch of color. But any color sharpie will work. You must color on the matte side!
Time to cut the shrinky dinks out. A little note. If you’ve accidentally torn the shrinky dink a little when cutting out the images – don’t worry. It’ll come back together when it’s in the oven.
If you’re going to make them into a keychain – it’s time to make a hole in them. You’ll need a large hand hole puncher, or make several holes to create one larger hole. Remember it will shrink greatly so you need to create a pretty big hole to make it into a keychain. We recommend at least one centimeter in diameter.
Now it’s time to bake and shrink! Turn your oven, or convection oven, to 325 degrees Fahrenheit. Once it’s preheated, put the shrink dinks on a tray, matte side up, and place in the oven for about 2-3 minutes. They’ll curl up so much you think they won’t lay flat, then just like that, they’ll uncurl and stay flat. Once they flatten back down keep in the oven for about 30 more minutes – then take out.
Once they come out of the oven, take them out of the tray immediately and flatten them with a flat object – like a measuring cup. They will cool instantly so make sure to do this step quickly. And be careful as they are hot and you don’t want to get burned!
Here’s a little before of what size the shrinky dinks were.
Look at how much they shrunk after! It’s really so much fun.
Finish the keychains
Remember you have to hole punch a sizable hole before baking. After they’ve baked and cooled, place a string into the hole and tie. Then tie the keychain ring onto the string.
Make it a magnet
After it’s baked all you’ll need to do is add an adhesive magnet.
We cut the magnet to a smaller size than the shrinky dinks, it doesn’t need to cover the entire thing. You’ll peel the magnet off and add to the shrinky dink – it’s just that easy.
You must have an inkjet printer for the paper to work. Set your printer to print for matte paper.
Prints onto the flat/matte side.
If you have the coloring sheet printables – it’s time to color them in with sharpie pens. Color on the matte side.
Time to cut the shrinky dinks out.
If you’re going to make them into a keychain: you’ll need a large hand hole puncher, or make several holes to create a larger hole. We recommend at least one centimeter in diameter.
Turn your oven, or convection oven, to 325 degrees fahrenheit. Once it’s preheated, put lay the shrink dinks on a tray and place in the oven for about 2-3 minutes. They’ll curl, then uncurl and stay flat. Once they flatten back down keep in the oven for about 30 more minutes – then take out.
Take them out of the tray immediately and flatten them with a flat object – like a measuring cup. They will cool instantly so make sure to do this step quickly. And be careful as they are hot and you don’t want to get burned.
Make it a keychain or a magnet
Keychain
Remember you have to hole punch a sizable hole before baking – at least one centimeter.
Bake.
Place the string into the hole and tie. Then tie the keychain ring onto the string.
Magnet
Bake.
Cut the adhesive magnets down to size and stick onto the back of the shrinky dinks.
Printables are intellectual property of Eid Collective. You may not use Eid Collective printables to sell items or alter them in any way. Please do not send or distribute printables to others, once you gain access to the printables, it is for you, and you alone to print and enjoy.
Showcase it! When you print up the DIY Shrinky Dinks for Ramadan, make sure to tag us in your photos. We look forward to seeing how you’ve displayed it!
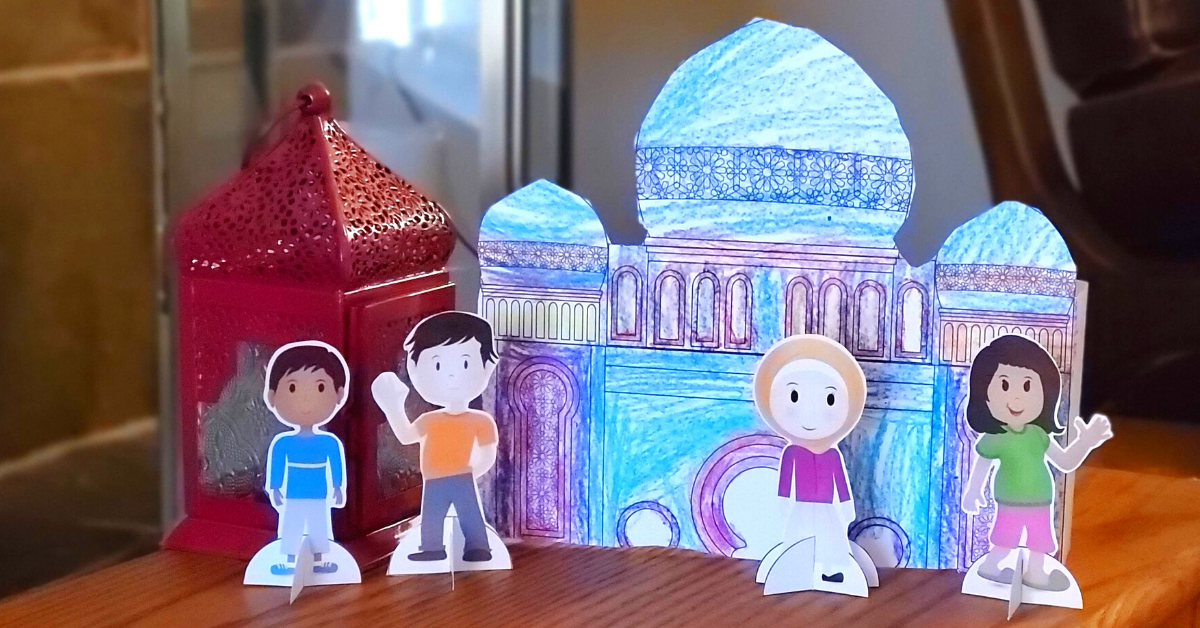
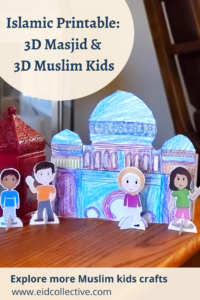
Get the kids involved with this quick, interactive Islamic craft that can keep them entertained too.
Islamic Printable: 3D Masjid & 3D Muslim Kids. This printable is aimed at getting the kids involved in an activity, through coloring the masjid. And then keeping them entertained later with the Muslim kid cut-outs. And if you don’t have kids, the masjid coloring sheet looks great by itself as decor. That’s a versatile printable!
This Islamic printable was designed by Sarah Bilal @sarah.bilal100.
Sign up for our newsletterand make sure to follow us on Instagram for more Ramadan & Eid inspiration.
Note: This post contains affiliate links. You can read our privacy page.
Black & White Masjid
Print out the black and white masjid coloring sheet – glue two together and use as decor.
Masjid & the Kids
Grab the kids and color in the masjid with some crayons for some family fun. Include the 3-D kids and you’ve got an interactive Ramadan display for the kids.
Display the Blue Masjid
For a different look, print just the blue masjid and incorporate into your decor and in the kid’s Ramadan area.
Putting the Masjid Together
Let’s grab the supplies. The printables, some crayons, scissors and a glue stick.
Color the masjid coloring sheet – kids love to get involved here! As you can see below…
Cut out the masjids you’re using. You’ll need two of each to make the masjid’s 3D and stand up on their own. Make sure to take this step to fold the side parts of the masjid. Folding along the lines – making two folds.
Put glue on the area is says to – on both masjids.
Now stick the two identical masjids together. Press and hold for maximum stick. Let dry before putting upright.
Now onto the Muslim Kids
Print them up and grab your scissors.
Cut the kids out. We left a little white space to make it easier to cut out.
To make the Muslim kids 3D you’ll need to place them in their stands. For the stands, cut just the part that’s black, going about three-quarters of the way up, but not cutting all the way! Then stick the kids into the stand, with the slits matching.
Now that’s a versatile printable!
Supplies
Printable
Scissors
Glue stick
How To – Tag
Print the printable
Cut the masjids
Glue the masjids together
Cut out the kids characters
Put the kids characters onto their stands
Printables are intellectual property of Eid Collective. You may not use Eid Collective printables to sell items or alter them in any way. Please do not send or distribute printables to others, once you gain access to the printables, it is for you, and you alone to print and enjoy.
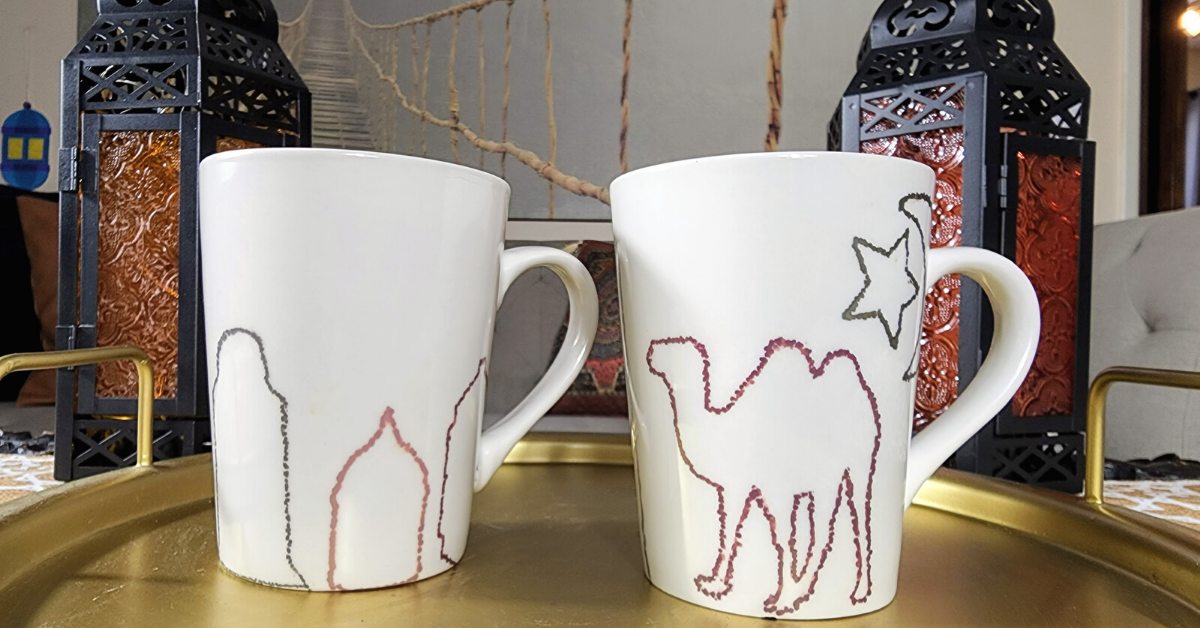
This is a super cute Ramadan craft for the entire family.
These DIY Ramadan coffee mugs with sharpies have never ending options. Make a few for each family member for iftar. Create gifts for loved ones for Eid. Or, and my favorite, capture your child’s drawing abilities on a mug. And make sure to check the supplies list because we’re using oil-based paint markers. Regular Sharpies just aren’t going to stay on.
Sign up for our newsletterand get all the DIYs sent to you email every time. And make sure to follow us on Instagram for more Ramadan & Eid inspiration.
Note: This post contains affiliate links. You can read our privacy policy.
Let’s start this off with all the notes. Regular sharpies aren’t going to cut it. They’ll just end up coming off – go with the oil-based sharpies. And please note the colors change once you bake them. Just like glazing pottery, the end result ends up being different sometimes. The baking directions are pretty specific, so make sure you read them to a T. We did a lot of research for these so it’s best to follow what we’ve outlined.
For this Ramadan craft we’ve got options for those who know how to draw, and those of us that can’t. So don’t fret, the entire family can get involved – printables at the bottom. We even think this is a great craft for teens this ramadan!
Lastly, cheap mugs work best because their glaze isn’t great, letting your Sharpie stay on better.
Supplies
Let’s talk supplies first. You can always skip to the bottom for all the supplies & instructions.
Grab the kids and free draw! We vote it’s more fun to let the children draw out whatever they want, as opposed to using a stencil. It’s really fun to capture their age and abilities to draw through this craft. Another reminder about the colors – they will change in the oven. Just like the pottery glazes will shift colors in the fire.
Use Cut Outs
For those of use that can’t draw, use our printable cutouts! You can either outline them with a solid line or dot around the images. This makes for a much nicer mug that looks way better than your freehand drawing.
If you’re using the printable cut outs, go ahead and take your time cutting them off.
Next up, take some tape and adhere the images to the mug. What’s fun is we have a bunch of different images so you can make the mugs however you’d like. Then take your sharpie and dot around the image or outline them.
Here are the free draws from the kids and the adults. Obviously, one adult really knows how to draw! But check out how adorable the little ones are.
Remember the colors will change once you bake them
If you’re using the printable
Cut the printables out
Tape the cut out how you want them on the mug
Dot or trace the images
Once you’re done place the mugs in a cold oven.
Preheat the oven to 450 degrees.
Once it’s reached temperature, bake for 30 minutes. This really smells! Make sure to put the fan on and open windows.
Once it’s been 30 minutes, turn the oven off and LEAVE THE MUGS IN A CLOSED OVEN.
Cool for 15 minutes, then slightly crack the oven and let it cool overnight.
This should help seal the sharpies onto the mug.
Hand wash the mugs once you use them.
Printables are intellectual property of Eid Collective. You may not use Eid Collective printables to sell items or alter them in any way. Please do not send or distribute printables to others, once you gain access to the printables, it is for you, and you alone to print and enjoy.
Showcase it! When you print up the DIY Ramadan Coffee Mugs with Sharpies, make sure to tag us in your photos. We look forward to seeing how you’ve displayed it!


")